Digital Female Face
- Ankur Nanda
- Jul 16, 2020
- 5 min read


The aim for this project is to create a generic female face. So, I went through references and observed work of many artists to have better idea of the concept. The best way to get the basic proportion of the model is to study every muscle of it. I followed the book ‘Anatomy for sculptures’ to start the model from scratch.


I have always been fond of character modelling from where I started sketching and drawing to get the understanding of those areas having volume and shadows. I invested a lot of time to decide the shape of a face while collecting many references from 3D scan store, anatomy 360 and used Pure Ref window to collect all the references at one place.
For this project I am going to use softwares like:
· Pixologic ZBrush
· Autodesk Maya
· Autodesk Mudbox
· Marmoset Toolbag 3
· Substance painter
· Photoshop
· Arnold
There are useful contents available on the internet that we can download from websites like Texturing.xyz for texture maps, you can buy it from there and HDRI Haven for Skydome light in Arnold.
Sculpting
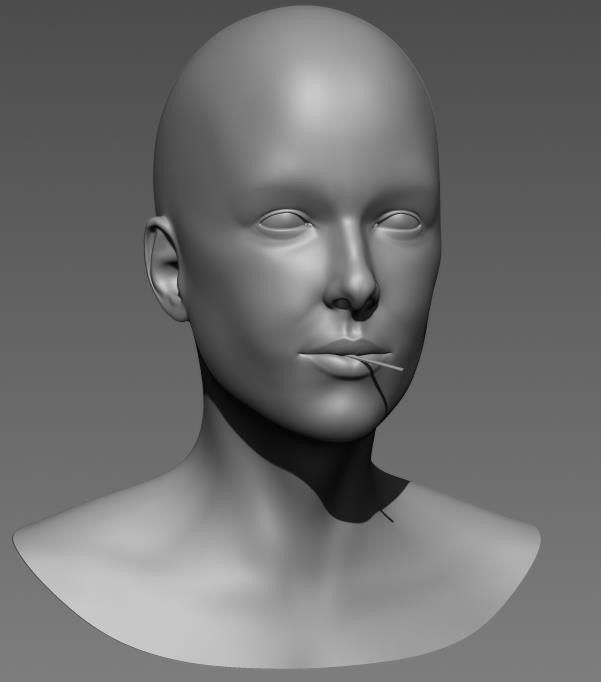
There are many ways to start a model, either we can start it in Autodesk Maya or in Zbrush software. I started sculpting to get basic proportion using moving tool, clay brush, clay build up, standard and soft brush.

Then I started to add Dyna mesh step by step while adding details in the areas of head, neck, cheeks, eyes, nose, lips, and ears to get proper proportion of face. I collected references from every angle because I found that every face is very complicated and different from each other as the proportion is different from every angle. Hence, I made sure I stick to the references. I sculpted from every angle because it might look inappropriate if we stick to one view. I try to not to sculpt on high subdivision or high dyna mesh. I try to achieve the proportion in low dyna mesh and then I increase it for more detailing. I never add every detail at single time, it is like a back forth process.


I started to make low-res with quad draw tool for female. I really like to work on a clean mesh and equal size of polygons. This keeps the file easy to maintain and less heavy. I opened the UV in Maya because we need to go for surface detailing and texture after finishing the hires. I sculpted the closed eyesfor opening the UV and transfer UV maps into the mesh which had opened eyes.

I always like to work on multiple assets alongside, I started to sculpt eye in Autodesk Maya.


Rather playing with dyna mesh I use to make low res in Maya and then I added subdivisions in zbrush after projecting it on the hires. The number of subdivisions depends on how clean mesh do we need for detailing. It doesn’t mean we need subdivisions of number 7 or 8 because it will just make the file heavy. Projection really works like a bake. I always work on layers so that I have a back up plan and I can see the progress while switching it off and on. I projected the details of hi-res on low-res model in Zbrush using project tool. We can find it in the sub-tool region. I switched off the blur option so that I can get the accurate details. Then I kept adding the amount of detail in each subdivision until I reached the final stage of surface detailing.


Surface Detailing
In the next part I have worked on Surface detailing in Mudbox. I have gone through many tests in Zbrush and Mudbox before achieving the final output. I did research on many skin alphas and displacement maps to get the knowledge of skin pours because skin pores are different on various locations of the face and it should be in the flow. For the final output we import my lowres of female in the Mudbox. There are many textures you can buy from the website like Texturing.xyz. With the help of that I started projection of displacement Map on my female model

After exporting the projected map from Mudbox, I imported the map in photoshop. I exported the red, green and blue channels from the Map as primary, secondary and micro details. I always made sure that I flip the imported map because Zbrush automatically flip the map while importing and I turned on Store MT in morph target. I also turned on the texture map and import the channels one by one in individual layer and I turned on the displacement while importing the map into it. After achieving the final output, from multi exporter I created maps for exporting displacement map in .exr format. I also exported 3rd subdivision Mesh for Maya look and development.


Micro Pores

Secondary Pores

Primary Pores
Morph at low Sub division

After few more clean ups.


Texturing
For the texturing part, I imported the model into Mudbox and added new layer for diffuse map.

While clicking on the projection tool short cuts appear on the display, then I projected the map from every different angle on the same scale.

After cleaning up the diffuse map in the photoshop I imported the model into Autodesk Maya for the final look and development. I imported the Female model and I assigned standard surface to it. I imported the base color and displacement.exr in the attributes.


Then I added displacement map in .exr format in the attributes which I found helpful for adding depth in the skin pours.

I am working on the better final output and for that I think Depth of field is very important point to discuss. It works with the focal length from the camera, the distance between the object and the camera. Depth of field will be found in the camera setting. Make sure the object detail is clicked on in the display -> Heads up display option.

I added area lights and Skydome light in the scene. I did some research on lighting and I found good HDRI texture from HDRI Haven website.

I did some research in Subsurface which gave some really good effect of skin reflecting the lights.

I also made some adjustments with subsurface radius, where I managed the scale of light particles to get the better output.


Alongside I was thinking of giving an expression to the model with a prop. For that I made a simple lowres with a sphere and cylinder mesh in Maya software and imported it into Zbrush for surface detailing.


I used crease tool in Zbrush for hard edging rather than using crease in Maya, because I think it is easy to maintain smoothness in Zbrush. We can also use subdivide method for that. For this Prop, I have used crack bushes and dam standard brush for the damage look.

I bake the prop in the marmoset Toolbag 3. Marmoset Toolbag 3 is the fastest way to bake and the process of cleanup is good. I Imported the low-res and decimated hires in the marmoset.

Before hitting the texture part, I did some research in the color theory, ambient occlusion, RGBA color theory, roughness, Specular, metalness, opacity and Subsurface.
I have used Substance painter for texturing. I imported the FBX mesh and normal map that I baked from marmoset and I baked the other maps like Ambient Occlusion, position map, curvature, thickness, and world space.

I have worked on layers where I always make sure to keep the file clean and less complex. I added layer to give the prop a base color. For other shader layers I keep adding black mask while right clicking to the layers. I have worked on noise, grunges, surface shader, crystal effect, and groves.

I exported all textures in 4k with Arnold preset.
when we import the texture map into Maya ai standard surface from substance Arnold preset, it automatically flips the normal map into OpenGL so, just uncheck the Flip R and G channel into Geometry->Bump attribute . It will solve the issue in the render.

Hypershades


AOV


Comments